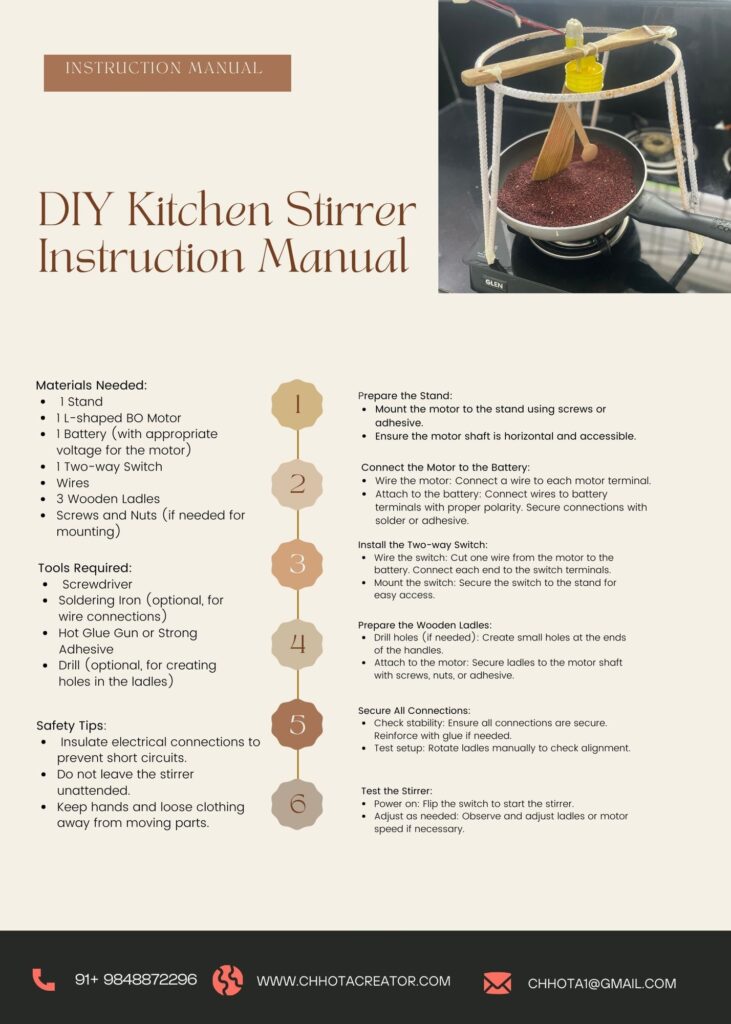
In this blog, I’m going to share a simple yet meaningful DIY project that I recently completed: a kitchen stirrer. This project is close to my heart because I made it to help my grandmother. She loves cooking but often struggles with pain in her hands from constant stirring and standing for long periods at the stove. This homemade stirrer aims to ease her burden and make her time in the kitchen more enjoyable.
Why I Made This
Growing up, my grandmother’s kitchen was always filled with the most wonderful aromas. Her love for cooking is apparent in every meal she prepares. However, as she’s gotten older, the physical demands of cooking have become more challenging. Seeing her in pain from stirring for long periods and standing at the stove was heart-wrenching. I wanted to create something that would alleviate some of this strain and help her continue doing what she loves without discomfort. This DIY kitchen stirrer was my solution.
Materials and Tools Needed
Before diving into the construction, gather the following materials and tools:
- Materials:
- 1 Stand
- 1 L-shaped BO Motor
- 1 Battery (appropriate voltage for the motor)
- 1 Two-way Switch
- Wires
- 3 Wooden Ladles
- Screws and Nuts (if needed)
- Tools:
- Screwdriver
- Soldering Iron (optional, for wire connections)
- Hot Glue Gun or Strong Adhesive
- Drill (optional, for creating holes in the ladles)

Step-by-Step Instructions
Step 1: Prepare the Stand
- Mount the Motor: Secure the L-shaped BO motor to the stand using screws or a strong adhesive. Ensure the motor shaft is positioned horizontally and is accessible for attaching the ladles.
Step 2: Connect the Motor to the Battery
- Wire the Motor: Connect one wire to each terminal of the motor.
- Attach to the Battery: Connect the other ends of the wires to the battery terminals, ensuring proper polarity. Use a soldering iron or strong adhesive to secure the connections.
Step 3: Install the Two-Way Switch
- Wire the Switch: Cut one of the wires going from the motor to the battery and connect each end to the two terminals of the two-way switch.
- Mount the Switch: Secure the switch to the stand in a convenient location for easy access.
Step 4: Prepare the Wooden Ladles
- Drill Holes (if needed): If the ladles do not have holes for mounting, use a drill to create small holes at the ends of the handles.
- Attach to the Motor: Attach the wooden ladles to the motor shaft using screws, nuts, or a strong adhesive. Ensure they are securely fastened and evenly spaced for balanced stirring.
Step 5: Secure All Connections
- Check Stability: Ensure all connections are secure and stable. Reinforce any loose components with hot glue or a strong adhesive.
- Test the Setup: Gently rotate the ladles manually to check for smooth movement and proper alignment.
Step 6: Test the Stirrer
- Power On: Flip the switch to power on the motor and start the stirrer.
- Adjust as Needed: Observe the stirring action and make any necessary adjustments to the positioning of the ladles or motor speed by adjusting the battery voltage if possible.

Safety Tips
- Ensure all electrical connections are insulated to prevent short circuits.
- Do not leave the stirrer unattended while in use.
- Keep hands and loose clothing away from the moving parts while the stirrer is operational.
Final Thoughts
Creating this DIY kitchen stirrer was a labor of love. It’s a simple device, but it holds a lot of meaning for me and my grandmother. Now, she can continue to cook her delicious meals without worrying about the physical strain. I hope this guide inspires you to create something that brings joy and ease to someone you care about. Happy DIY-ing!
